Postal Crack Milwaukee Public Museum
For systems that have ACPI- compatible BIOS chips that also run. You need a POST card to display the codes and a list of codes specific. awcrack.exe (26K.

The program also features a customizable activity list so you can set different paces for different. ITUNES GIFT CARD GENERATOR V3. AWCRACK RAR.
Card Games. Cheats. Children Games. Classic Games. Desktop Toys. Emulators. Fighting Games. Games for girls. Graphic Adventures. Horror games. Mahjong Solitaire. Misc.
Postal Crack Milwaukee Public Schools
Your options are to purchase a card from the compatible list or to research and identify a card which matches your criteria then purchase it.


Awcrack rar download;. lexar card reader driver;. descargar controlador de video compatible vga para.
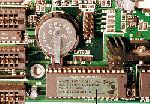
CMOS (complementary metal oxide semiconductor) is a special type of memory (64K) used to hold crucial system operation information called the BIOS (basic input/output system). The instructions it holds are permanently written to the chip. The CMOS needs very low power to operate. It is recharged every time the computer is turned on. Most modern boards do not use batteries. The time and date is kept by the CMOS. The type of CMOS does not effect the performance of the system. BIOS is a program that manages data flow between the operating system and attached devices such as the clock, hard disk, ram, video adapter, input/output devices and power management. It is an integral part of your hardware. The BIOS is accessible to the microprocessor on an erasable programmable read-only memory (EPROM) chip. When you turn on your computer, the microprocessor passes control to the BIOS program, which is always located at the same place on EPROM. When BIOS boots up your computer, it first determines whether all of the attachments are in place and operational and then it loads the operating system. Some BIOS setting can be changed from inside the operating system such as the time and date. The BIOS inside a personal computer determines whether the date will handle the year 2000 correctly. The three leading BIOS manufacturers are AWARD, Phoenix and AMI (American Megatrends) . Introduction Next to the CPU, the BIOS is the most important chip found on the motherboard. A firmware device, the BIOS provides vital services at bootup, hardware standards for your system and, through its configuration utility, many ways to customize your system. To understand the differences between hardware, software, and firmware, see "The Essential Parts of Any Computer". The BIOS (Basic Input Output System) chip performs a variety of important tasks during system operation. On systems that use 32-bit versions of Microsoft Windows (Windows 95 or newer), the BIOS has relatively little to do with system operation after the boot process has been completed. However, during the boot process, the BIOS is an extremely critical component. Tasks that the BIOS chip performs include The CMOS (Complementary Metal-Oxide Semiconductor) chip stores the settings that you make with the BIOS configuration program. The BIOS offers you many different options for most system components controlled by the BIOS, but until the settings are stored in the CMOS, the system is unable to run. The BIOS and Standard Devices The BIOS is a complex piece of firmware ("software on a chip") that provides support for the following devices and features of your system: Selection and configuration of storage devices, such as hard drives, floppy drives, and CD-ROM drives Configuration of main and cache memory Configuration of built-in ports, such as IDE hard disk, floppy disk, serial, parallel, PS/2 mouse, and USB Selection and configuration of special motherboard features, such as memory error correction, antivirus protection, and fast memory access Support for different CPU types, speeds, and special features Support for advanced operating systems, including networks, Windows 9x, and Windows 2000 (Plug and Play) Power management Storing System Settings: To enable the BIOS to perform these tasks, two other components on the mother- board work with the BIOS: the CMOS chip, also known as the RTC/NVRAM (Real-Time-Clock/Non-Volatile RAM), and the battery. The CMOS stores the settings that you make with the BIOS configuration program and contains the system's Real-Time-Clock circuit. Power from a battery attached to the motherboard is used by the CMOS to keep its settings. Figure 3.1 shows a typical socketed BIOS and battery. The A+ Certification test might ask you to identify these devices on a motherboard and to explain their operation. Figure 3.2 The Dallas Semiconductor DS12887A (left) clock/battery chip, CR-2032 lithium battery (center), and the AA-size 3.6 volt Eternacell (right) have all been used in computers for maintaining CMOS settings. When the battery starts to fail, the clock will start to lose time. Complete battery failure causes the loss of all CMOS configuration information. When this takes place, the system cannot be used until you install a new battery and re-enter all CMOS configuration information by using the CMOS configuration program. Because the battery maintaining settings can fail at any time, and viruses and power surges can also affect the CMOS configuration, you should record important information before it is lost. See "Saving and Recording BIOS/CMOS Settings," later in this chapter, for details. POST The POST (power-on self test) portion of the BIOS allows the BIOS to find and report errors in the computer's hardware. For the POST to work correctly, the system must be configured correctly, as you will see in "System Configuration," later in this chapter. The POST checks the following parts of the computer: Beep Codes Beep codes are used by most BIOS versions to indicate either a fatal error or a very serious error. A fatal error is an error that is so serious that the computer cannot continue the boot process. A fatal error would include a problem with the CPU, the POST ROM, the system timer, or memory. The serious error that beep codes report is a problem with your video display card or circuit. Although systems can boot without video, seldom would you want to because you can't see what the system is doing. Beep codes vary by the BIOS maker. Some companies, such as IBM, Acer, and Compaq, create their own BIOS chips and firmware. However, most other major brands of computers and virtually all "clones" use a BIOS made by one of the "Big Three" BIOS vendors: American Megatrends (AMI), Phoenix Technologies, and Award Software (now owned by Phoenix Technologies). As you might expect, the beep codes and philosophies used by these three companies vary a great deal. AMI, for example, uses beep codes for over 10 "fatal" errors. It also uses eight beeps to indicate a defective or missing video card. Phoenix uses beep codes for both defects and normal procedures (but has no beep code for a video problem), and the Award BIOS has only a single beep code (one long, two short), indicating a problem with video. Because beep codes do not report all possible problems during the startup process, you should not rely exclusively on beep codes to solve system problems. You can hear some typical beep codes by using the CD-ROM included with this book. Onscreen Error Messages Most BIOS versions do an excellent job of giving you onscreen error messages indicating what the problem is with the system. These messages can indicate problems with memory, keyboards, hard disk drives, and other components. Some systems document these messages in their manuals, or you can go to the BIOS vendors' Web site for more information. Keep in mind that the system almost always stops after the first error, so a serious problem early in the boot process will stop the system before the video card has been initialized to display error messages. POST Codes and POST Cards In Chapter 1, "Basic Concepts," you learned about the different ways data passes through the system. One method, used by virtually all devices, is to send data through one of 65,535 I/O port addresses. The POST also uses an I/O port address (usually 80h), sending a series of codes indicating the progress of testing and booting. The hexadecimal codes output by the BIOS change rapidly during a normal startup process as different milestones in the boot process are reached. These codes provide vital clues about what has gone wrong when your system won't boot and you don't have a beep code or onscreen messages to help you. To monitor these codes, you need a POST card such as the one shown in Figure 3.3, available from a variety of vendors, including JDR Microdevices (http://www.jdr.com) or Jensen Tools (http://www.jensentools.com). These cards are available in versions that plug into either ISA or PCI expansion slots. The simplest ones have a two-digit LED area that displays the hex codes, whereas more complicated (and expensive) models also have additional built-in tests. The same hex code has different meanings to different BIOSes. For example, POST code 31h means "display (video) memory read/write test" on an AMI BIOS, but it means "test base and extended memory" on the Award BIOS, and it is not used on Phoenix BIOS. As with other types of error messages, check your manual or the BIOS maker's Web site for the meaning of any given code. Figure 3.3 The Ultra-X PC Inspector card features POST display (1), DMA conflict detection (2), and IRQ conflict detection (3) among its many features. The best way to learn to use a POST card is to plug it into a healthy system and watch the codes change during a normal system startup. Typically, the codes change very quickly until the final code (often "FF") is reached and the system starts. On a defective system, the codes will pause or stop when a defective item on the system is tested. The cards remove easily and need not be left in systems routinely. To prepare yourself for the A+ Certification exam, make sure you can identify the three different methods computers use for identifying errors (beep codes, onscreen codes, and POST codes) and when each method is most appropriate for discovering why a computer cannot boot. Transferring Control to the Operating System with the Bootstrap Loader During the POST, drives and other standard devices have been detected. Frequently, information about the CPU, hard disk, floppy disk drive, memory size and type, and ports are displayed onscreen at the end of the POST (see Figure 3.4 ). Figure 3.4 A typical Pentium-based system configuration screen displayed on system startup. Use this information for a quick view of the system's features, including CPU type and speed, RAM size and type, drive configuration, and more. Next, the BIOS searches for an operating system on the drives listed in the BIOS configuration as bootable drives. The first drive containing an operating system will be used to start the computer, and at that point the BIOS transfers control of most of the computer to the operating system. The portion of the BIOS responsible for starting the system is called the bootstrap loader (from the old expression "pulling yourself up by your bootstraps"). For a more detailed look at how the startup process works after the BIOS locates the operating system, see Upgrading and Repairing PCs, 12th Edition, Chapter 25, "The Hardware Boot Process." Warm and Cold Booting A cold boot or hard boot refers to starting the computer with the power or reset switch, which runs the entire POST and bootstrap process. A warm boot or soft boot skips the POST and refers to restarting the computer with the MS-DOS Ctrl+Alt+Del key sequence or the Windows 9x/2000 Start, Shutdown, Restart menu. Figure 3.5 shows a typical screen displayed during a cold boot. Figure 3.5 The screen during a cold boot. Note the memory test at the upper-left side. On an MS-DOS–based system whose hard disk and floppy disk drives are connected to the motherboard, the BIOS is used to operate the drives. However, for systems using Windows 95 and newer, device drivers are loaded by the operating system to replace the BIOS. Still, without the BIOS, the system would not know what hardware was onboard or whether it was working. System Configuration For the BIOS to be able to start the computer, you've seen that it must find an operating system on a hard disk or floppy disk drive. But how does the BIOS know where the drives are located or what types they are? Floppy disk drives and hard disk drives are two of the most important items that must be configured in the BIOS. If the drive types are not correctly identified in the BIOS, the BIOS will not be able to start the system. Whenever you build a system or change major components, you need to run the BIOS setup program to check or change settings. Starting the Setup Program On most systems built since the late 1980s, the BIOS configuration program is stored in the BIOS chip itself. On a few current systems, as with the original IBM AT, the setup program must be run from a floppy disk drive or the hard drive. The original IBM PC and PC/XT had only a few settings, and these were made by manipulating a series of small rocker or slide switches called DIP switches. ROM-based setup programs are normally started by pressing one or more keys in combination within the first few seconds after turning on the computer. Although these keystrokes vary from system to system, the most popular keys on current systems include the escape (Esc) key, the Delete key, the F1 key, and various combinations of Ctrl+Alt+ another specified key. Most computers display the correct key(s) to press during the initial startup screen. Check with your system vendor for the appropriate keystrokes or to see if you need to run a program from MS-DOS or Windows to configure your system. Because the settings you make in the BIOS setup program are stored in the nonvolatile RAM of the CMOS chip, the settings are often called CMOS settings. In the following section, we will review the typical setup process, looking at each screen of a typical Pentium-class system. Step-by-Step CMOS/BIOS Configuration The A+ Certification exam will test your knowledge of basic CMOS/BIOS configuration. To help you prepare for the exam, this section covers the most important portions of the CMOS/BIOS setup process. To start the CMOS setup process, press the correct key(s) during the bootstrap process or run the setup program from hard disk or floppy disk after the computer has started. On virtually all systems built since the early 1990s, you'll start with a menu screen, as shown in Figure 3.6. This menu, as well as the contents of the screens listed, will vary according to your BIOS brand, version, and motherboard type. Figure 3.6 Select the menu item from this CMOS Setup menu to examine or change settings. Select Standard CMOS Setup to begin. Other systems will immediately display the Standard CMOS Setup screen, which is typically used to configure drive, date, and time settings. Standard CMOS Configuration The standard CMOS configuration screen (see Figure 3.7) includes settings for items such as Although software drivers can be used as workarounds for hard drive and Y2K compliance, BIOS is best. BIOS upgrades must be performed very carefully because an incomplete or incorrect BIOS upgrade will prevent your system from being accessed. Regardless of the method, for maximum safety I recommend the following initial steps: Download the correct BIOS upgrade for your system or motherboard. For generic motherboards, Wim's BIOS page (http://www.ping.be/bios/) also has links to the motherboard vendors' Web sites. You might also need to download a separate loader program, or the download might contain both the loader and the BIOS image. If the Web site has instructions posted, print or save them to a floppy disk for reference. Next, install the BIOS upgrade loader and BIOS image to a floppy disk. Follow the vendor's instructions. After installation is complete, restart your system with the floppy disk containing the upgrade. Press a key if necessary to start the upgrade process. Some upgrades run automatically; others require that you choose the image from a menu, and prompt you to save your current BIOS image to a floppy disk. Choose this option if possible so you have a copy of your current BIOS in case there's a problem. After the update process starts, it takes about three minutes to rewrite the contents of the BIOS chip with the updated information. Don't turn off the power! Wait for a message indicating the BIOS upgrade has been completed. Remove the floppy disk and restart the system to use your new BIOS features. If you want the computer to test the memory, which type of boot process (warm or cold) will you want the customer to perform? Why? Have the customer perform a cold boot by shutting off the system and restarting it, or by using the reset button. Cold boots run the entire POST, including the RAM test, and warm boots don't.


 RSS Подача
